

Does smart thermostat installation seem intimidating? You’re not alone! Many homeowners worry about messing with their HVAC systems, but the process is actually much simpler than you might think.
Installing a smart thermostat is a worthwhile investment that can save you money and energy. These intelligent devices can learn your habits and automatically adjust temperatures, making your home more comfortable while managing energy use more efficiently. Before you start the installation process, however, it’s important to check whether the smart thermostat you’ve chosen is compatible with your existing system. Major brands like Ecobee, Google Nest, and Honeywell provide compatibility checklists to verify if your home has the necessary equipment.
Throughout this guide, we’ll walk you through each step of how to install a smart thermostat safely and confidently. From turning off power and removing your old thermostat to connecting wires correctly and setting up your new device, we’ve got you covered with clear, beginner-friendly instructions.
Ready to upgrade your home’s temperature control without breaking anything? Let’s get started!
Turn Off Power and Prepare Safely
Safety should always be your first priority when installing a smart thermostat. Let me walk you through the crucial preparation steps before you begin touching any wires.
Why turning off the HVAC system matters
Electrical safety isn’t optional during smart thermostat installation. Working with live wires creates serious shock hazards. Even low-voltage thermostat systems can cause injury or damage to your HVAC components if mishandled.
Furthermore, accidental wire contact while power is flowing can short out expensive circuit boards in your heating and cooling equipment. Taking a few minutes to shut off power properly now can save you hundreds in repair costs later.
How to locate the correct breaker
The circuit breaker for your HVAC system is typically housed in your main electrical panel, commonly called the breaker box. Look for breakers labeled “HVAC,” “Furnace,” “AC,” or “Heating/Cooling.” In some homes, you might need to turn off multiple breakers if your heating and cooling systems have separate power sources.
After switching off what you believe is the correct breaker, verify the power is truly off. Try adjusting your current thermostat to force the system to turn on – nothing should happen. For absolute certainty, use a voltage tester on the thermostat wires to confirm no current is flowing.
Tools you’ll need before starting
Gather these essential tools before beginning your smart thermostat installation:
- Screwdriver set (Phillips and flat-head)
- Voltage tester to verify power is off
- Pliers for handling wires
- Smartphone or camera to photograph existing wiring
- Level (for precise mounting)
- Drill and bits (sometimes necessary for mounting)
- Wire labels or masking tape with pen
- Safety glasses (particularly if drilling is needed)
Additionally, keep your new thermostat’s installation manual nearby for reference. Since wire configurations vary between systems, having your specific instructions accessible prevents errors during installation.
Once your power is off and your tools are ready, you’re prepared to safely move on to the next step of removing your old thermostat.
Read other Articles – The 8 Best Cruelty-Free Mascaras for Sensitive Eyes Under $30 (2026 Update)
Remove the Old Thermostat
Now that the power is off, it’s time to carefully remove your existing thermostat. This step requires patience and attention to detail to ensure proper smart thermostat wiring later.
Take off the faceplate carefully
Most thermostats have a removable faceplate that pulls away from the base with gentle pressure. Don’t force it—excessive pulling could damage components or break mounting clips. Instead, look for release buttons, latches, or small screws that might be securing the faceplate. For stubborn faceplates, check if paint has created a seal around the edges; in such cases, scoring around the perimeter with a utility knife can help.
Take a photo of the wiring
This crucial step can save you significant trouble later. Before disconnecting any wires, take clear photos of your existing wiring setup. These images will serve as valuable references during installation of your new smart thermostat. Make sure your photos clearly show both the wire colors and terminal letters, as these will guide your connections later.
Label wires for easy reconnection
Never rely solely on wire colors when installing a smart thermostat. Colors aren’t standardized across HVAC systems, making proper labeling essential. As you disconnect each wire:
- Use the provided wire labels or masking tape to create small “flags” around each wire
- Label one wire at a time to avoid confusion
- Mark each wire according to its terminal letter (R, W, Y, G, C, etc.)
- Keep labeled wires from falling back into the wall (tape them temporarily if needed)
Detach the backplate from the wall
Once all wires are labeled and secure, remove the mounting screws holding the backplate to the wall. Some backplates may have additional cover plates that need to be removed first. If the backplate seems stuck despite removing all screws, check for paint adhesion or hidden fasteners. After removing the backplate, you’ll have a clean slate for installing your new smart thermostat.
Throughout this process, remember that careful removal creates the foundation for successful installation of your new smart thermostat.
Install the New Smart Thermostat
With your wall prepared and wires ready, it’s time to mount your new smart thermostat. This stage requires attention to detail for successful installation.
Check if you need a C-wire
Most modern smart thermostats require a C-wire (common wire) for continuous power to their Wi-Fi, display, and smart features. Unlike traditional thermostats, these devices need constant 24V power. Typically, C-wires are blue or black, although colors aren’t standardized. If your system lacks a C-wire, consider using:
- A C-wire adapter (often included with your thermostat)
- An unused wire repurposed as a C-wire
- A power extender kit
Use the new backplate as a template
Hold the new backplate against the wall where your old thermostat was mounted. Feed the labeled wires through the central opening. Use the built-in level to ensure proper alignment, then mark screw hole positions with a pencil.
Drill holes and mount the backplate
For drywall installations, drill small pilot holes and insert the provided anchors. If you’re mounting to a junction box, you’ll likely need the trim kit that came with your thermostat to cover any wall blemishes. Secure the backplate with screws, being careful not to overtighten.
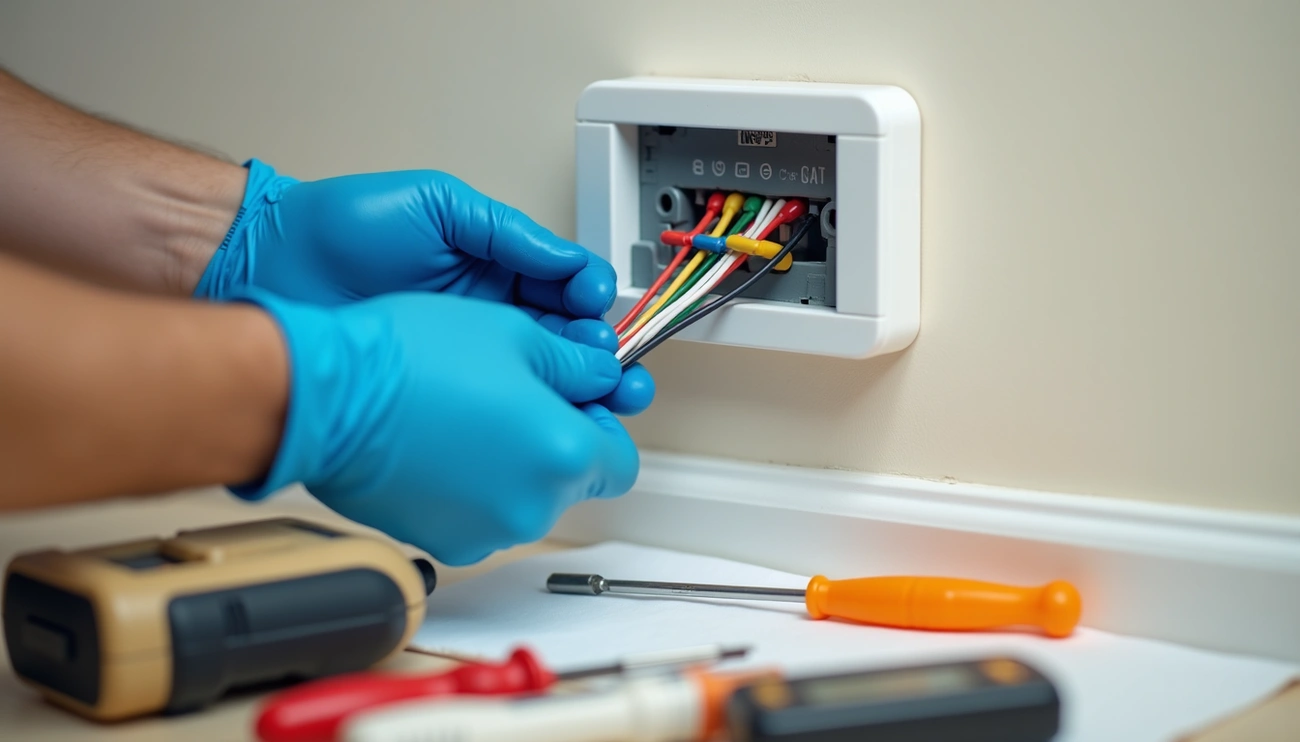
Reconnect wires to correct terminals
Following your labeled wires and photos, connect each wire to its matching terminal:
- R wire to R terminal (power)
- G wire to G terminal (fan)
- Y wire to Y terminal (cooling)
- W wire to W terminal (heating)
- C wire to C terminal (common)
Push each wire firmly until it clicks or the terminal lever locks in place.
Attach the new faceplate
Once all wires are connected, gently push excess wiring into the wall opening. Carefully align your thermostat’s faceplate with the mounted backplate and press until it clicks securely into position.
Read other Articles – 20 Best EPCOT Snacks to Try in 2026 (With Prices & Locations)
Power On and Set Up the Thermostat
The final phase of smart thermostat installation involves powering up and configuring your device. Once the hardware is in place, a few more steps will get your system running smoothly.
Turn the power back on
Head back to your circuit breaker panel and restore power to your HVAC system. Once the power returns, your new smart thermostat should automatically begin booting up. Some models may show a blinking red light indicating the battery is charging. If your device doesn’t power on immediately, wait a few minutes for the internal battery to charge sufficiently.
Connect to Wi-Fi and download the app
As the thermostat boots up, it will guide you through connecting to your home’s Wi-Fi network. Most smart thermostats require a 2.4GHz Wi-Fi connection rather than 5GHz. After entering your network password, download your thermostat’s companion mobile app from your device’s app store. Create an account and follow the prompts to link your thermostat, typically by scanning a QR code or entering a setup code displayed on the screen.
Follow on-screen setup instructions
Subsequently, your thermostat will present configuration prompts. These typically include:
- Setting your location for accurate weather data
- Confirming your HVAC system type
- Inputting basic information about your home
- Establishing temperature preferences
- Creating a basic schedule
Test heating and cooling functions
Important to realize, testing ensures everything is working properly. Most thermostats include a built-in test mode accessible through settings. Alternatively, manually adjust the temperature setting:
- For heating, raise the temperature until the display changes color (typically orange)
- For cooling, lower the temperature until the display changes (typically blue)
- Listen for your system to activate within 5 minutes
For slow-responding systems like in-floor radiant heating, you might need to wait 30 minutes or longer to notice temperature changes.
Conclusion
Installing a smart thermostat yourself is significantly more straightforward than most homeowners initially believe. Throughout this guide, we’ve walked through each crucial step of the process, from safely turning off power to connecting the final wires. Additionally, we’ve covered important aspects like checking for C-wire compatibility and properly labeling your existing wiring to avoid confusion.
Smart home technology becomes far less intimidating once you break down the installation into manageable steps. Most importantly, your new programmable thermostat will start saving you money almost immediately through more efficient temperature control. Many users report energy savings between 10-15% on heating and cooling costs after switching to smart climate control systems.
Remember, patience is crucial during this DIY project. Take your time with the wiring connections and double-check your work before restoring power. The careful attention you put into the installation will pay off with years of reliable temperature control and energy efficiency.
The convenience of controlling your home’s climate from your smartphone or through voice commands truly makes the process worthwhile. Once you start enjoying your new smart thermostat, be sure to explore additional features like geofencing, usage reports, and maintenance reminders to fully maximize the benefits of your home automation upgrade. Your comfort, convenience, and reduced energy bills are just a few taps away!
FAQs
Q1. Can I install a smart thermostat on my own? Yes, you can install a smart thermostat yourself. The process is simpler than many people think. With proper preparation, careful attention to wiring, and by following the manufacturer’s instructions, most homeowners can successfully install a smart thermostat without professional help.
Q2. What are the basic steps to set up a smart thermostat? Setting up a smart thermostat involves several key steps: turning off power, removing the old thermostat, installing the new backplate, connecting the wires, attaching the faceplate, restoring power, connecting to Wi-Fi, and following the on-screen setup instructions. Finally, you’ll need to test the heating and cooling functions to ensure everything is working correctly.
Q3. Is it possible to replace my old thermostat with a smart one? In most cases, yes. However, it’s important to check compatibility before purchasing. Most smart thermostats are designed to work with a wide range of HVAC systems, but you should verify that your system is compatible and that you have the necessary wiring, particularly a C-wire for constant power.
Q4. What wires are essential for a smart thermostat installation? The most common wires required for a smart thermostat are R (power), G (fan), Y (cooling), W (heating), and C (common). The C-wire is particularly important for smart thermostats as it provides continuous power for Wi-Fi and other smart features. If your system lacks a C-wire, you may need to use an adapter or power extender kit.
Q5. How much can I save on energy costs with a smart thermostat? Many users report energy savings between 10-15% on heating and cooling costs after switching to smart thermostats. These devices can learn your habits, automatically adjust temperatures for efficiency, and allow for remote control, all contributing to reduced energy consumption and lower utility bills.
Interested in similar content or opportunities. Contact Us